Showing posts with label Bread. Show all posts

Sunday, October 14, 2012

The Homestead Hoagie: Pumpkin Marinated Tofu & Homestead Bread

It may not be much, but I used half the arugula, an heirloom tomato, a little cilantro and some pantry items to make...The Homestead Hoagie!  I desperately needed to make a protein and a grain to tag along with the veggies.


Let's get right down to work, I'm all tuckered out!

Green Monster Bread with Pumpkin Marinated Tofu (recipe below), Heirloom Tomatoes and Organic Cilantro (produce is all CSA).


This recipe is an approximate recreation of the recipe I made on Friday night.

Pumpkin Marinade (for tofu, tempeh or seitan)

1 clove garlic, chopped or pressed
½ a can (or 1 cup) canned pumpkin or cooked pumpkin or squash
2 T organic sunflower oil
1 ½ tsps hot chili oil
2 T maple syrup (Grade B preferred)
1 tsp organic tamari
1 tsp Kosher Salt
1/8 tsp ground cinnamon
1/8 tsp garlic powder
1 ½  cups organic apple juice and/or pumpkin beer
*I used apple juice, haven’t tested yet with the beer, but I think it would be great.

I add the marinade directly to  a 5 cup (1.2 L) tupperware container.  Whisk well with the Mini Whisk O’ Doom, see below, (or use a fork).  Add pressed tofu (I use a TofuXPress, and I love it) cut into large triangles, tempeh (slice it into quarters and steam it for 10 minutes before adding to marinade), or seitan (best added warm from the pan, but OK if not).  I used one package (one pound) of pressed tofu but could have fit another half package in. 

Top off with apple juice, apple cider or pumpkin (or other beer, stoudt would be great) beer until just covering tofu, tempeh or seitan.  Cover tupperware tightly and shake gently to mix.  Store in refrigerator for up to two weeks, shaking gently (I invert the whole container a few times, holding the top on tightly!) when you think of it to mix it.  Use the tofu/tempeh/seitan right out of the marinade and add more protein to it if you want.  I always do this with marinade for vegan foods, and it’s always fine.  Let sit for at least 12 hours or overnight before using, shaking gently when you think of it.

Ain't she purdy?

To sautè tofu as pictured below, heat a well seasoned cast iron pan for 3 minutes on medium heat.  Then, add about 1 tsp of olive oil to pan and swirl around to coat heat oil for about 10 seconds.  Add tofu, leaving on whatever marinade is sticking to it.  Cook 4-5 minutes on the first side until golden, flip, cook about 3 minutes on the second side, again, until golden brown.  Serve for breakfast, lunch or dinner! Would be great on a sandwich as pictured, in a breakfast wrap or as the “egg” main with some tempeh bacon and potato hash, with a side of sauteed greens and cornbread for dinner, etc. 

You can also cook down the marinade into a sauce to serve over your tofu et al.  


Enjoy! We loved this marinade.  So glad it percolated in my cowboy hat in time for MoFo! 

Now, the bread, what’s the recipe for the bread?  Well, I used the recipe for Green Monster Bread in Tami & Celine’s new book, Vegan Sandwiches Save the Day!  


It's fantastic, put one in your cart the next time you stop by the ol' trading post.

I doubled the arugula (since I had so much) and I used white whole wheat flour (instead of AP) and it was no worse for wear!  In fact, I think she liked the extra greens and that WWW flour mighty fine.


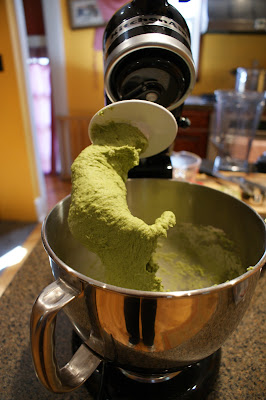
 Two green monsters!


 The Sheriff's at it again!

 You might not know it, but she was all green in the gills!

 She was down right delicious!
 A snack.


Pumpkin Marinated Tofu, well I'll be!  Keep it dry* now, ya' hear?


Homesteadin' it October 1st through October 31st, 2012

*keep it dry=keep it secret, keep it safe.

Saturday, January 21, 2012

Bucket Bread!


So, I'd seen these folks, an M.D. and a professional baker, hawking their wares on daytime T.V.: a "five minute" artisan bread recipe that you mix in a bucket and leave in your fridge for up to two weeks, swiping some every time you want to pop a loaf in the oven.  It marinated in my subconscious for months.  

Then, a chef I adore blogged about making their pizza dough from their newest book (which focuses on pizza), AND she shared that she used an amazing kitchen tool to mix the dough.  

*Subconscious trigger pulled, firing wildly in the conscious* 

OK, it's high time to give this a try.  The early birthday present to myself arrived on Friday.  My son was sick, so he napped all afternoon, and even though I'd been up since 5:00 a.m. with him I couldn't help myself.  

I opened the boxes.

Book, Danish Dough Whisk (this thing is awesome) and Big Buckets with Lids


 Danish Dough Whisk, Made in Poland :-)

I (quietly!) scrubbed the new buckets and the whisk, and readied the ingredients to make the "Master" dough, a Boule (artisan free-form loaf).

It only involves FOUR ingredients: warm water, yeast, salt and flour.  The Master recipe is here on the author's website!  

Put everything in your bucket (warm water and yeast first, followed by flour and salt) and stir with your Danish Dough Whisk (really, this is one of the best kitchen tools I have ever used!) The dough whisk really incorporates the dough so well with minimal effort and minimal sticking (if you used a plain wooden spoon, this very wet dough would have stuck all over it).

Mix dough until dry and wet ingredients are well incorporated.
This gloppy mess is correct! It is how you want it to look.

Now, cover and let it rise for 2-5 hours at room temperature.  The dough will rise high up!  Mine went up to the five quart line, which I think is standard.  It is really fun to watch it rise.  Here it is at about one hour:
It will come back down to this level once it's in the fridge for a while, too.

Once it's done rising, put it in the fridge.  Now you can make bread anytime you want, for up to two weeks!

So, since we got an inch of ice last night instead of snow, we were stuck in the house.  Time for a trial loaf of Bucket Boule!

You must let the loaf "rest" (this is basically your second rise, the first rise being the bucket rise) before baking.  This can be a long time depending on the loaf (min is 20 min, max is somewhere near 2 hours).


Both crumb and crust were excellent.  Tasted exactly like Whole Food's boule which costs $6 (or used to, I haven't shopped there for a long time! I'm engaged to Wegmans and gettin' some on the side with Trader Joe's.).  We ate the whole thing this morning! And, I have dough for three more loaves in the fridge.

The book will pay for itself in three loaves :-)  Or, it will be free from the library if you can find it!

P.S. Baking these breads obviously does NOT take five minutes (and I didn't expect that it would since I am familiar with traditional bread recipes, but other folks would have no idea!).  No part of it takes five minutes.  Mixing it was extremely fast, maybe about 10 minutes, and then you have that initial rise for the 2-5 hours.  But THEN when you want to make your bread, you still need to give that loaf time to rise once you form it.  And you still need to bake it (however long the recipe says).  The time you save with this technique is to remove the first two steps of bread making: mixing the dough and the first rise.  After you make the initial batch, you no longer have to do these steps, you just start with the bucket dough.  It's fantastic, but not five minutes.  At all.  Ever.  Just had to say that.

Oh, and I also made some other stuff today. 

XOXO