Showing posts with label chocolate. Show all posts

Tuesday, January 15, 2013

Chocolate Chip Cookie Cake (Updated)

My Chocolate Chip Cookie Cake...an easy, crisp-chewy cake with a toothsome crust, tender crumb, moist interior and complex, salty-sweet-smoky flavors owing to the olive oil, significant portions of brown sugar and kosher salt and the nuttiness of the white whole wheat flour.  

I made it again last night to nail down the recipe and the bake time.  The result was magnificent!

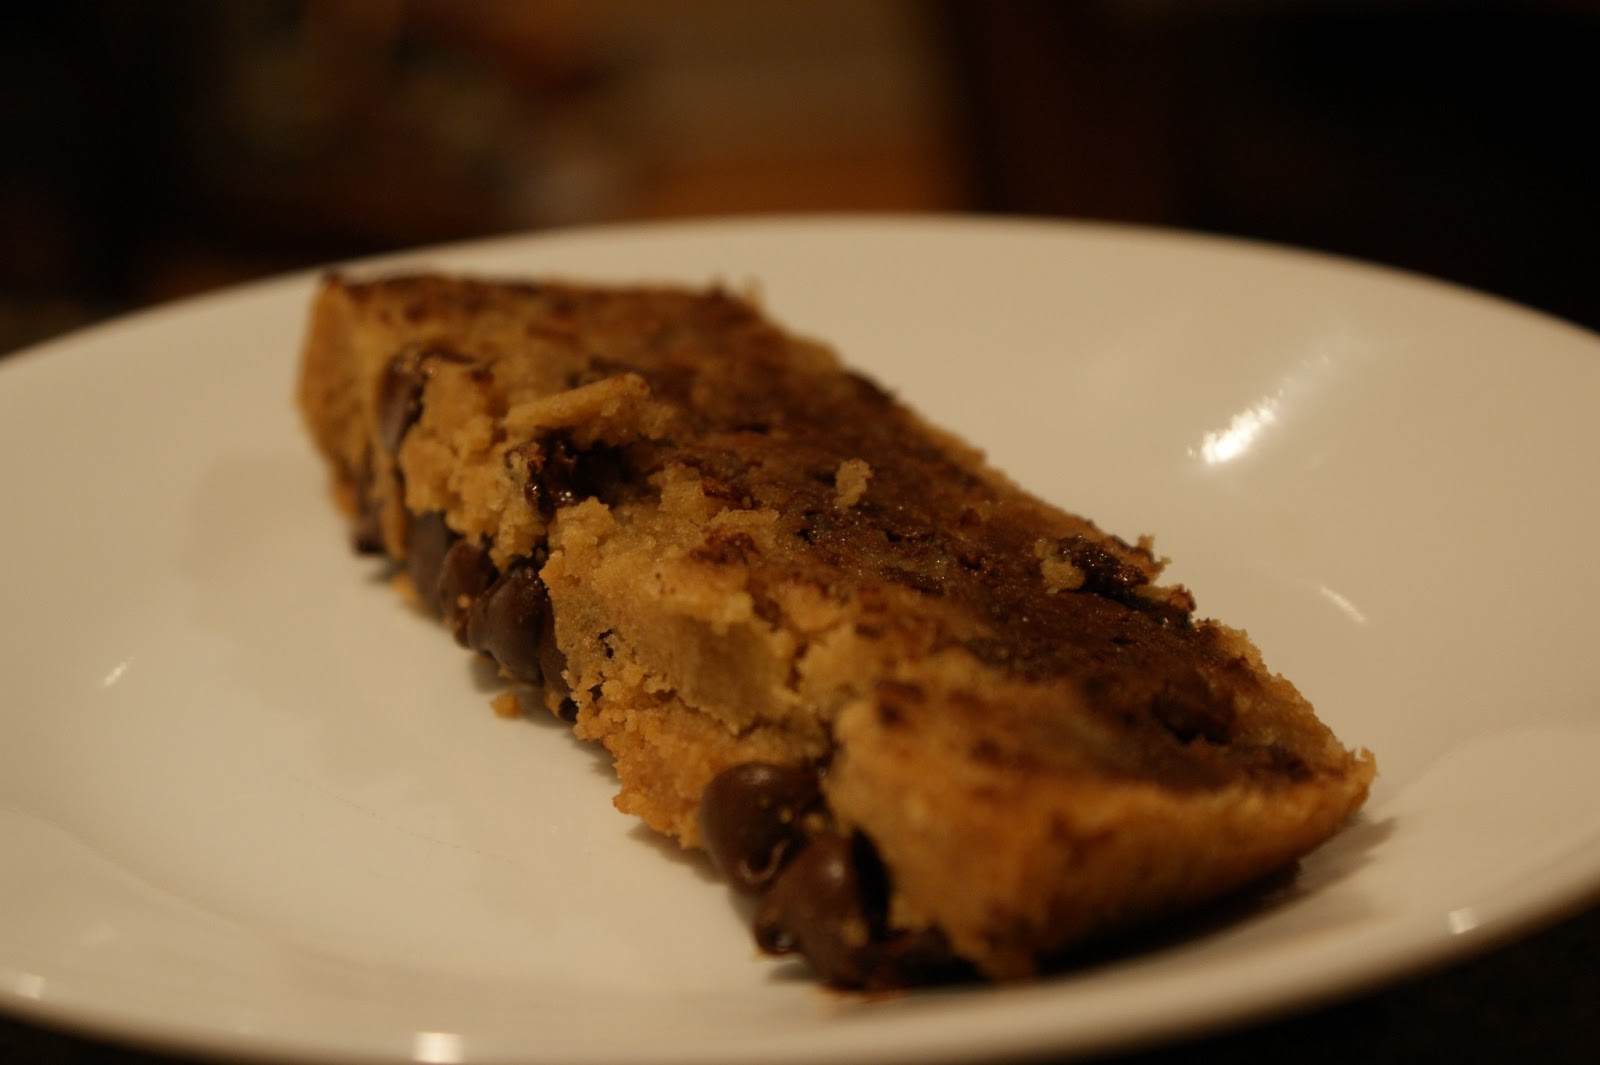
A crisp-chewy cake perfect for the cookie lover and cake needer alike.

This cake is so easy.  Everything goes into one big mixing bowl!

The Chocolate Chip Cookie Cake

1 Cup Organic Granulated Sugar
1/2 Cup Organic Brown Sugar (I use TJ's)
3/4 Cup Best Quality Extra Virgin Olive Oil*
*I know! It's fantastic, trust me! This would be great with Colavita Private Selection Fruttato EVOO or the Colavita Argentinian Fruity EVOO...therefore, it is my entry into the Colavita Contest hosted by The Urban Vegan!  
1/4 Cup Organic, Unsweetened Applesauce
2 tsp. EnerG Egg Replacer Powder (just the powder)
1 tsp. Vanilla
1 tsp. Kosher Salt

2 and 1/3 Cups White Whole Wheat Flour--a whole grain! :-)
(I love King Arthur's brand here)
1 tsp. Baking Powder
1 and 1/2 Cups Best Semi-Sweet Chocolate Chips 
(I like WF 365, Ghirardelli, etc.)
Optional: 1/2 Cup Chopped Walnuts (if you are so inclined)

Method:
Preheat your oven to 375 degrees.
Combine Sugars through Kosher salt in a mixing bowl and blend with a hand mixer until thoroughly combined:
It will have a gel-like consistency.

Now, add your dry ingredients (I use a fine mesh sieve over the bowl to sift the dry stuff in and save a bowl!) and mix with a spoon or spatula until well combined.
It will look like this.  Like sticky pieces of sandy dough.

Now, add your chips!
It will look like this :-)

Now, press all the dough into a well-greased loaf pan.  This is a "large" NordicWare pan, it measures eight inches across the floor, and almost ten across the top.
Dough packed into the pan.  I pressed it in with a spatula.

Now, bake her at 375 for 20 minutes (the higher heat gives a nice crispy crust) then lower the heat to 350 (as not to dry it out) and bake another 25 minutes.  The edges will get a bit golden and a toothpick will come out clean.
This cake will not rise very much (hardly at all).  It is a dense, delicious olive-oil based cake (so tender! so rich!) so don't worry that it didn't puff up. 

Close up of the golden edges.  It's harder to tell how "golden" the edges are when using White Whole Wheat flour, but you can see it there.

Allow to cool, then cut and serve!  It's OK if it is still a little warm :-)
When you cut it, use a sharp paring knife as the outer crust will be crispy, but the inside is soft, moist and cookie-like.  

Pack it for lunches, too!


I wrap individual slices in foil then store them in a zipper freezer bag, too, for cookie cake anytime :-)

EVOO is sweet!

Enjoy, guys. This one is worth a splurge!


Wednesday, July 4, 2012

S'Mores Bars!


Need a sweet treat in this super hot weather? Oh yeah! You don't need to bake or heat up your grill or even your stove to make this amazing treat.  All you need are the ingredients, a 4 cup Pyrex measuring cup, a microwave (or a stove if you like heating up your house) and a 13x9 baking pan.  OH YES.

S'Mores Bars!

The ingredients: Almost a box (about 8 cups) of "graham squares," 1.5 cups chocolate chips, a container of  Ricemellow Cream (rice based, vegan marshmallow spread), 5 T. butter or margarine (I used EB), 1-2 tsp of vanilla extract, and 1/4 to 1/3 cup of rice syrup or corn syrup (spray your measuring cup with canola oil first so it slides right out!) and a small pinch of salt (1/8 to 1/4 tsp).


Add the chocolate chips, butter, and rice syrup to a 4 cup Pyrex measuring cup.  Microwave on high for a minute at a time, stirring in between, until melted.  Then add the whole container of Ricemellow Cream.  Microwave again for about a minute and stir to incorporate.


Oh yeah!

Now, simply pour your cereal into a large bowl (you can also add mini marshmallows or extra chocolate chips to the bowl, about 1/2 to 1 cup is what I would recommend).  Pour the melted chocolate marshmallow mixture over the cereal, stir well to coat all the cereal, and pour it into a buttered 13x9x2 inch baking pan.  

Cover her and put her in the fridge for a while to firm up.  Cut into bars as needed.  

You can also store the bars, wrapped individually in foil, in the freezer for up to a year.  They are totally fine after a year (trust me!).  

Enjoy!!

Saturday, February 18, 2012

Chocolate Peanut Butter Cups

I had never made homemade peanut butter cups before, but really wanted some on Valentine's Day, so, I made a batch.

These are really tasty and not too much mess to make, so if you are having a craving for a  rich, delicious peanut butter cup made with whole ingredients, give these a go.


Chocolate Peanut Butter Cups

Ingredients
4-6 tablespoons of Earth Balance butter or other vegan baking butter, see my note below
3/4 cup peanut butter
3/4 cup graham cracker crumbs or cereal crumbs like Puffins
1/4 cup organic brown sugar
1 cup nondairy chocolate chips (or carob, but I hate carob and it's made with palm oil)
1/4 cup coconut milk (aseptic box or refrigerated kind, not canned) or other non-dairy milk


Method 
1. Line a 12-cup muffin tin with paper liners. (If You Care makes unbleached liners made from recycled paper.) Set aside.
2. Melt the butter in a small saucepan over medium heat. I used Alicia's recipe's full 1/2 cup (1 stick) of EB and that was WAY too greasy and tasted too much like EB (which I only use in baked goods) so I had to keep adding cereal to it to make it a drier consistency.  I recommend using only 4-6 tablespoons (1/4 to 1/3 cup) of EB and keeping the rest of the ingredients the same. I don't really like EB, but the consistency works very well in baked goods and desserts, if you use the lesser amount (4-6 tablespoons) it should be fine and not taste like EB once you add all the other ingredients :-)  
3. Stir in the peanut butter, graham cracker or cereal crumbs, and sugar and mix well.  Note: I didn't have graham crackers (because we ate them all), so I just processed Original Puffins in the food processor until they were fine crumbs, and measured out 3/4 of a cup of the crumbs.  It was a fine substitution!
4. Remove the mixture from the heat. Evenly divide the mixture, approximately 2 tablespoons per cup, among the muffin cups. I used an Oxo medium scoop to do this task.
5. Combine the chocolate and milk in a 4 cup Pyrex measuring cup. Heat in microwave, covered, a minute at a time, whisking each minute, until the chocolate has melted and is combined well with the milk.
6. Carefully pour the chocolate evenly over each cup of the peanut butter mixture. 
7. Place in the refrigerator to set for at least 2 hours before serving.

I couldn't resist using my Silverstone muffin tin!  These were just poured and had not yet set in the fridge.

Enjoy!

This makes 12 large (!) cupcake sized peanut butter cups.  You can cut them into quarters and arrange prettily on a platter for smaller dessert "bites," or you can just go for it and eat a whole one per person.